Getting started
Four steps and about twenty minutes get you a forecast you can use. It doesn't have to be complete, and you can fill it in as you go.
New here? Start with Budgeting without linking your bank.
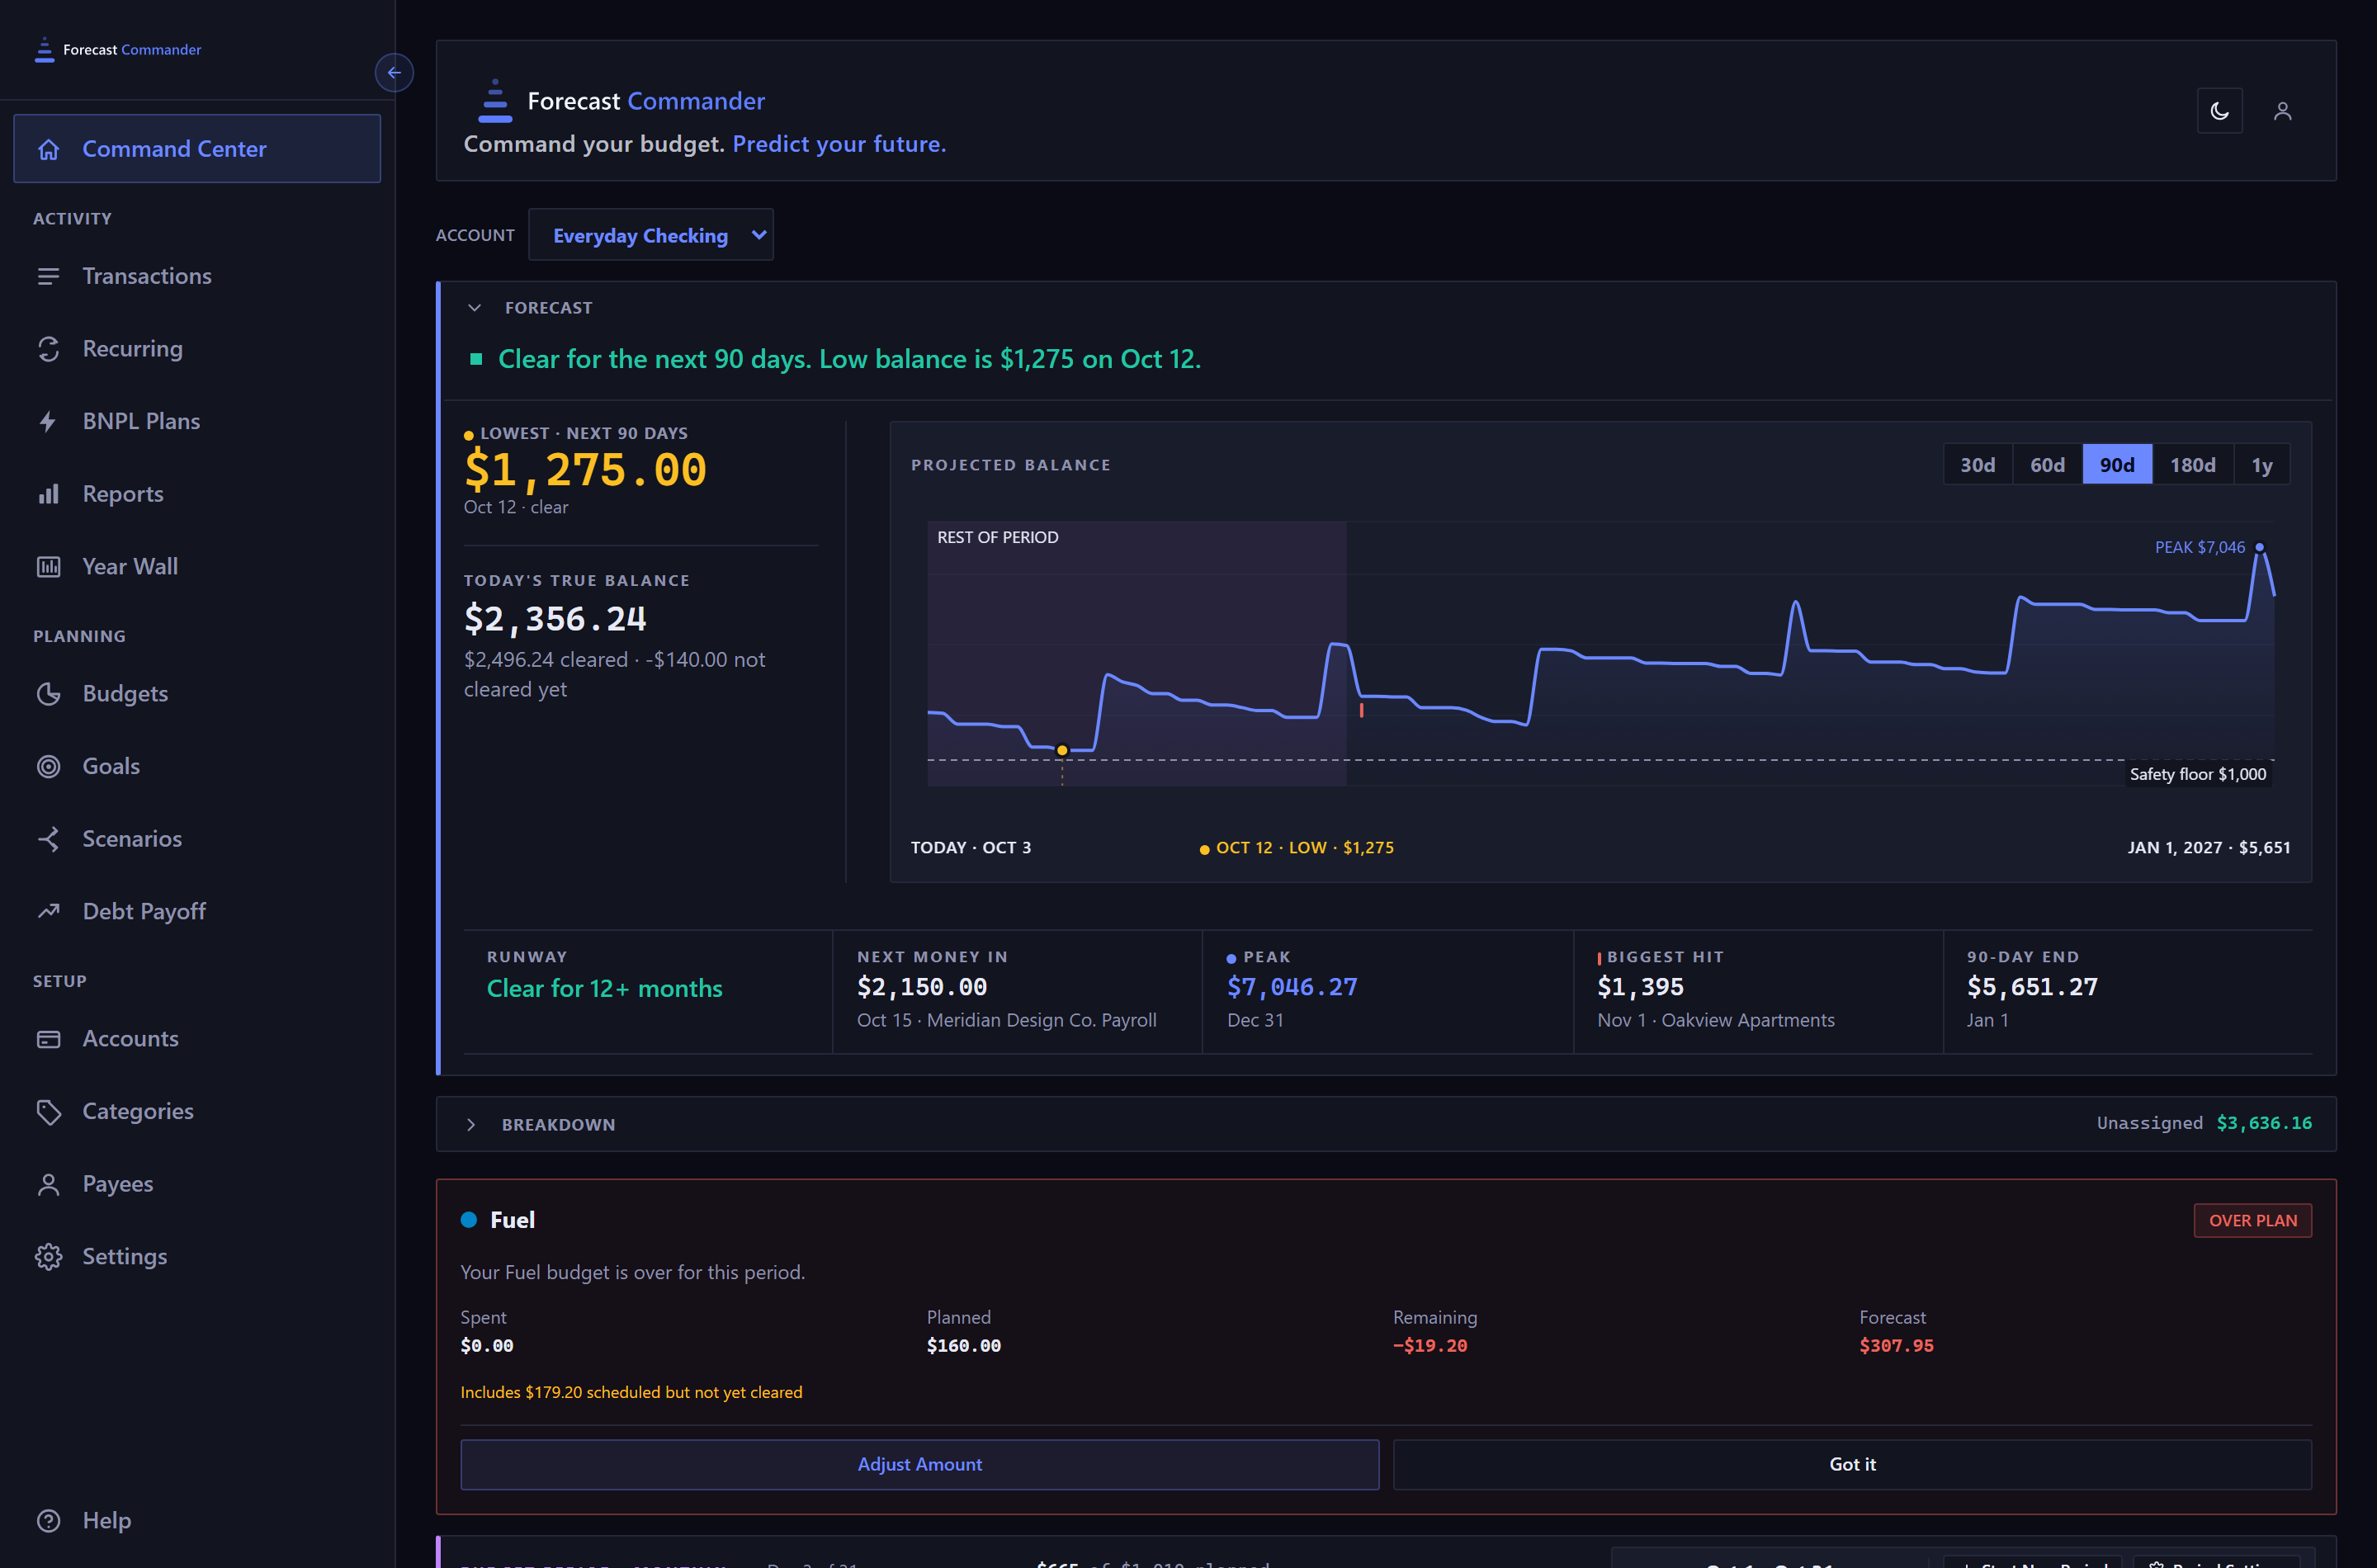
The screenshots are live captures of a demo account.
Last updated
Where you're headed#
When you're done, the top of the Command Center will read something like "Clear for the next 90 days. Low balance is $1,275 on Oct 12."
Your account starts with a 35-day trial, and we don't ask for a card. Passwords need at least 15 characters, and that's the only rule. The trial's end date is in Settings, Billing, and what happens when the trial ends is a two-minute read.
1. Add the account your bills come out of#
Start with the checking account most of your money moves through. Have its current balance ready, because the forecast counts forward from it.
You'll also be asked for a Safety Floor, the least you'd like to keep in the account. Every warning in the app is measured against it. A floor of zero only warns you when you'd be overdrawn, so pick a number you'd be uneasy going below.
Cards and loans can wait. One checking or savings account is enough for a forecast. More on accounts.
2. Add your pay#
Income comes next. Without it the line only goes down, and the forecast can't show you when things recover.
Add your paycheck as a recurring rule: the amount, the account it lands in, and how often it comes. If you're paid every two weeks, choose every two weeks, not monthly. A paycheck that lands on Friday the 14th changes what Thursday the 13th looks like, and only the real schedule gets that right.
3. Add what goes out#
Add the big, certain bills first: rent or mortgage, the car payment, insurance, utilities, and the subscriptions you'd notice. Each one needs an amount and a day of the month before the forecast opens, and if one is missing, the step tells you which.
Leave everyday spending for later. Groceries and fuel go in one entry at a time once you're up and running, and the forecast is useful without them.
If you have a bank statement handy, there's a faster way. Download it from your bank as a CSV file and open it in the statement reader. It finds the charges that repeat and offers to turn the ones you recognize into rules, and it may turn up a bill you'd forgotten. The file is read in your browser and never uploaded.
4. Read the forecast#
Go to the Command Center. The sentence at the top is the answer, and the figures under it show how it was worked out.
- If it says Clear
- Note the date of the low. That's the day to watch.
- If it's amber or red
- Open the crunch warning and read What's driving it. It lists the payees pulling the balance down, so you can see what to move or trim.
- If the numbers look wrong
- Check the small line under Today's True Balance. It usually explains the gap between the app and your bank, and the balance equation covers the rest.
What to do next#
The Command Center shows a Finish setting up panel with ten suggestions. None is required, and each one ticks itself off when you do it. If you'd like an order to follow, try this one:
- Add your cards and loans
- The forecast then shows what you owe next to what you have, and the payoff planner has something to work with.
- Record a one-off or two
- Anything coming up that doesn't repeat. The quick entry bar is made for it.
- Set a savings goal
- If you've set money aside for something, add it as a goal, and your available balance leaves it out. How that works.
- Budget one category
- Start with one and see how it behaves. Budgets has more to it than any other part of the app, and it's easier to learn one category at a time.
If you get stuck, How do I lists the common tasks and the quickest way to each.
Something wrong, or missing? The Feedback button in the footer sends it to a person, with the page you were on attached. How that works.
New here? See what Forecast Commander does.